Best DVD Ripper and DVD Converter to rip DVD to iPad, convert DVD and video to the popular video and audio formats. Pop Searches: best Blu-ray ripper, rip DVD, DVD Maker , DVD software, Copy DVD


How to burn DVD on windows and edit DVD menu?
It used to be true that, to make a DVD, one must have expensive equipment and machinery. Thanks to DVD Creator software, creating a DVD for playback on your digital player anytime and anywhere is possible. Because DVD Creator is a professional DVD Maker, which help users to burn video to DVD disc. With this powerful video to DVD Creator, users can easily convert all popular videos, like AVI, MPEG, DivX, DV, VOB, WMV, MP4, etc., to DVD disc, DVD folder or ISO files. Then users can enjoy the precious moments recorded by camera on DVD player. Also it allows users to DIY DVD menu at will.
Now I will show you how to make a DVD and edit DVD menu with the Best DVD Creator.
Step 1. Download and install DVD Creator
Free download DVD Creator software online, install and run it, then the interface will pop up.
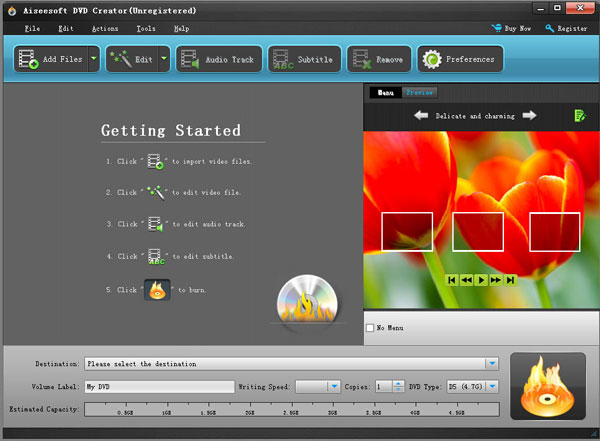
Step 2. Load video file
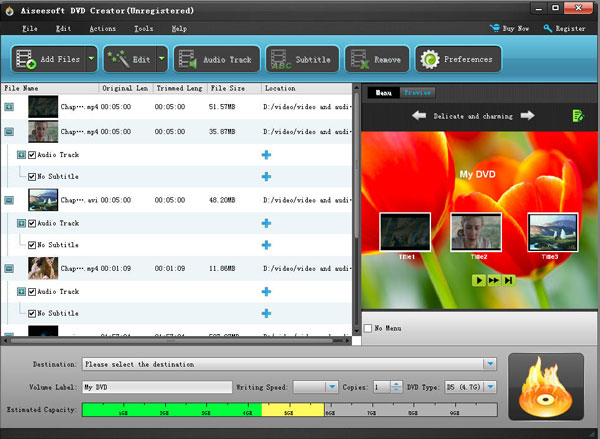
Directly load video files by clicking "Add Files " button to import a single video or multiple video files you want to convert or open "File" drop-down list choose the "Add Video/Add Folder" option.
Step 3. Convert video to DVD
This DVD burning software allows you to output video in three ways: DVD Disc, DVD Folder and ISO Files.

Burning DVD: First, insert a blank DVD disc to DVD-ROM, then name the Volume Label, set Writing Speed and choose output copies and DVD Type. Then, choose "Burning DVD" option from "Destination" drop-down list to create a DVD file.
Output DVD Folder: You can choose "save as DVD Folder" Option, then create a new folder and name it. Then, you can input any content to be the DVD Volume Label. Then, you can click "Output DVD Folder" Image Button to create a DVD file.
Output ISO file: Also, you can choose "save as ISO" Option to output an ISO file. Then, you can click "Output ISO file" Image Button to create a DVD file.
Tips: Edit DVD Menu
1. Choose Menu Template
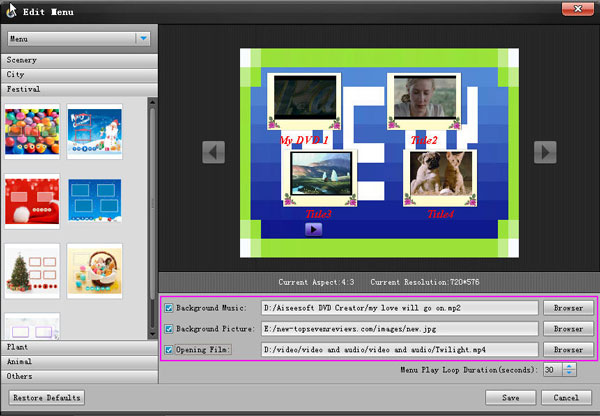
Click "Actions" column and choose "Edit Menu" option. There will list Scenery, City, Festival, Plant, Animal and Others 6 template themes, each of which has multiple corresponding templates to choose. You just need click any template you like to be your Play Menu.
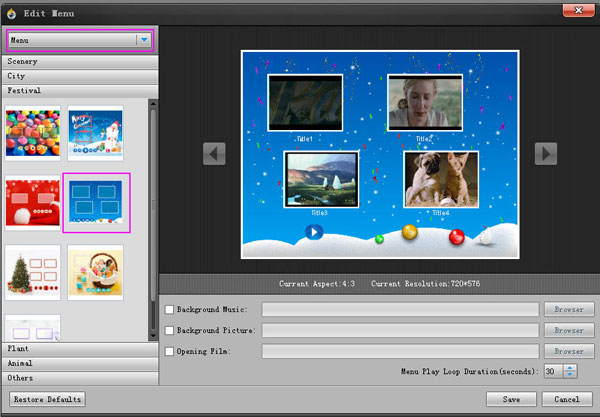
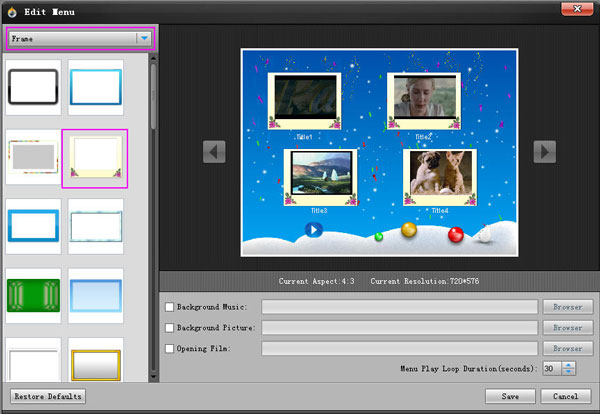
2. Choose Frame
Click "Frame" Option under the drop-down list to choose your favorite frame style for your DVD, then it will be immediately applied to your DVD Play Menu of each video file.
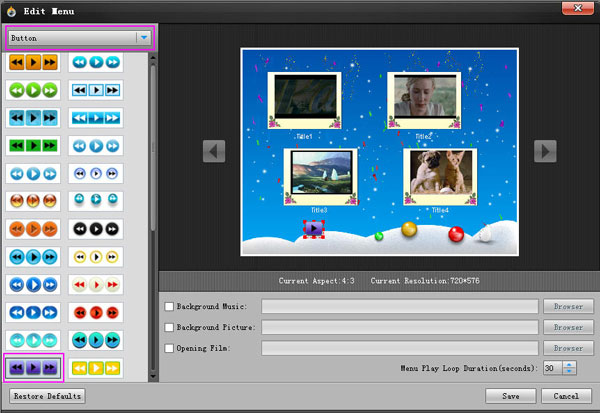
3. Choose Button
Choose "Button" Option from the drop-down list in the Edit Menu Window. Select any button style for DVD Play Menu Button.
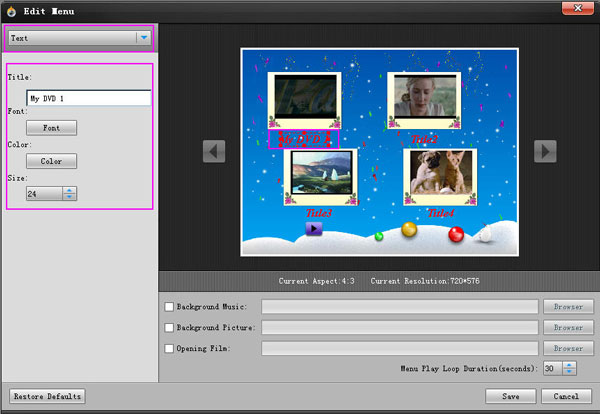
4. Edit Title
The "Text" Option under the drop-down list is provided for you to edit every DVD file title. There are Title, Font, Color and Size 4 editing items, which allow you to freely input any video title; choose your desired Font style; favorite color and proper font size to get perfect effect.
5. Add more effects
Add Background Music: You can add a song or a piece of music to the menu by clicking the "Background Music" checkbox.
Add Background Picture: You can add a picture to the menu to replace the chosen template image by clicking the "Background Picture" checkbox.
Add Opening Film: You can add a short-duration video file to the menu as a prologue of the output DVD file. Also, you can set the Loop Duration at random.
Then, after the five operations above mentioned, you can get a personalized DVD Play Menu.
No matter you intend to convert video to a DVD movie, or just want to experience the joy brought by your DIY works; DVD Creator software absolutely will meet your needs perfectly!